

Danger: High Voltage & Safety
Brakes and throttles are safety-critical controls. Ensure you double-check cable routing, verify that the throttle does not stick, and test the brakes in a safe, flat area before riding in traffic.
Required Parts & Tools
Have these ready before starting the repair. Clicking links supports our free guides.
Replacement Parts Needed
- Xiaomi M365 / Pro Replacement Throttle$8 - $12
OEM replacement throttle assembly containing the pre-soldered Hall sensor.
- Xiaomi M365 / Pro Replacement Brake Lever$10 - $15
Replacement brake lever assembly with integrated Hall sensor plug.
Tools Required
- Hex Key Set (Metric)$10 - $15
Used to remove handlebar grips, throttle screw (2.5mm or 3mm), and brake lever clamp.
- Torx T10 Screwdriver$5 - $8
Required to open the dashboard cover to check the connector plugs.
DIYStep-by-Step Instructions
- Step 1 of 5
Diagnose the Error Type
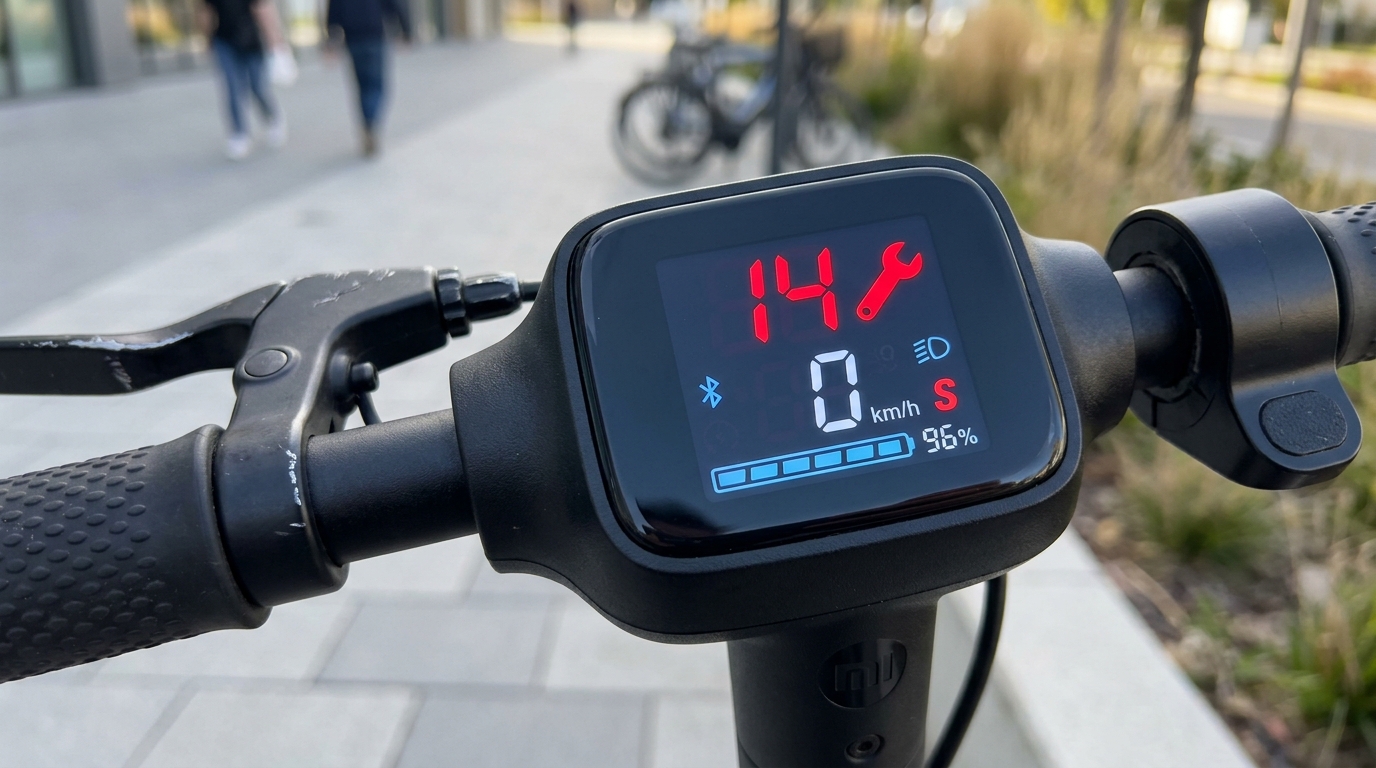
Error 14 indicates a throttle issue, while Error 15 indicates a brake lever issue. Turn on your scooter and check if the error is constant, or only triggers when you press the throttle/brake. If it only triggers when pressed, the Hall sensor might be out of range or misaligned.
- Step 2 of 5
Check the Dashboard Connections
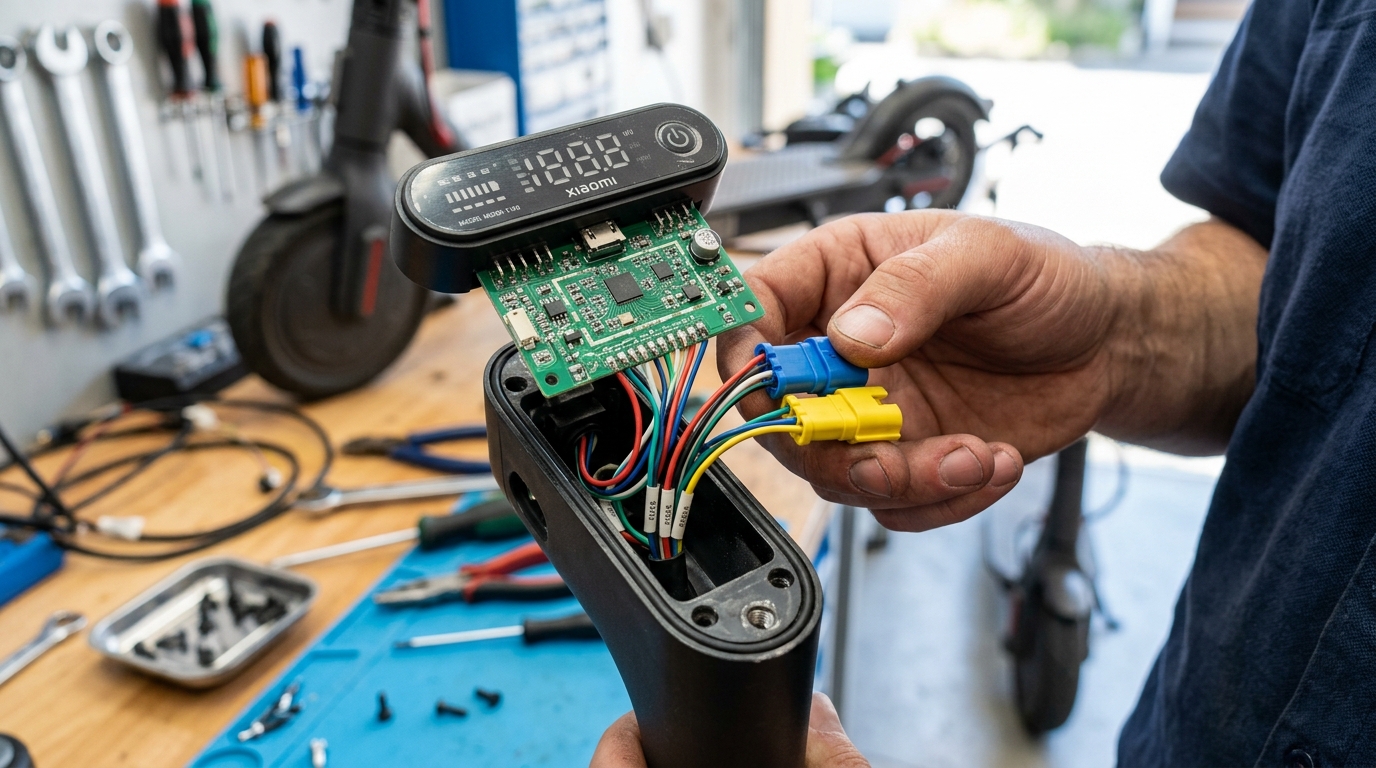
Carefully peel off the rubber dashboard cover using a thin tool, then unscrew the three Torx T10 screws holding the dashboard. Gently pull up the dashboard and locate the 3-pin throttle connector (blue cable) or brake connector (yellow/white cable). Ensure the connections are fully plugged in and there is no water corrosion inside the connectors.
- Step 3 of 5
Inspect the Throttle/Brake Magnet Alignment
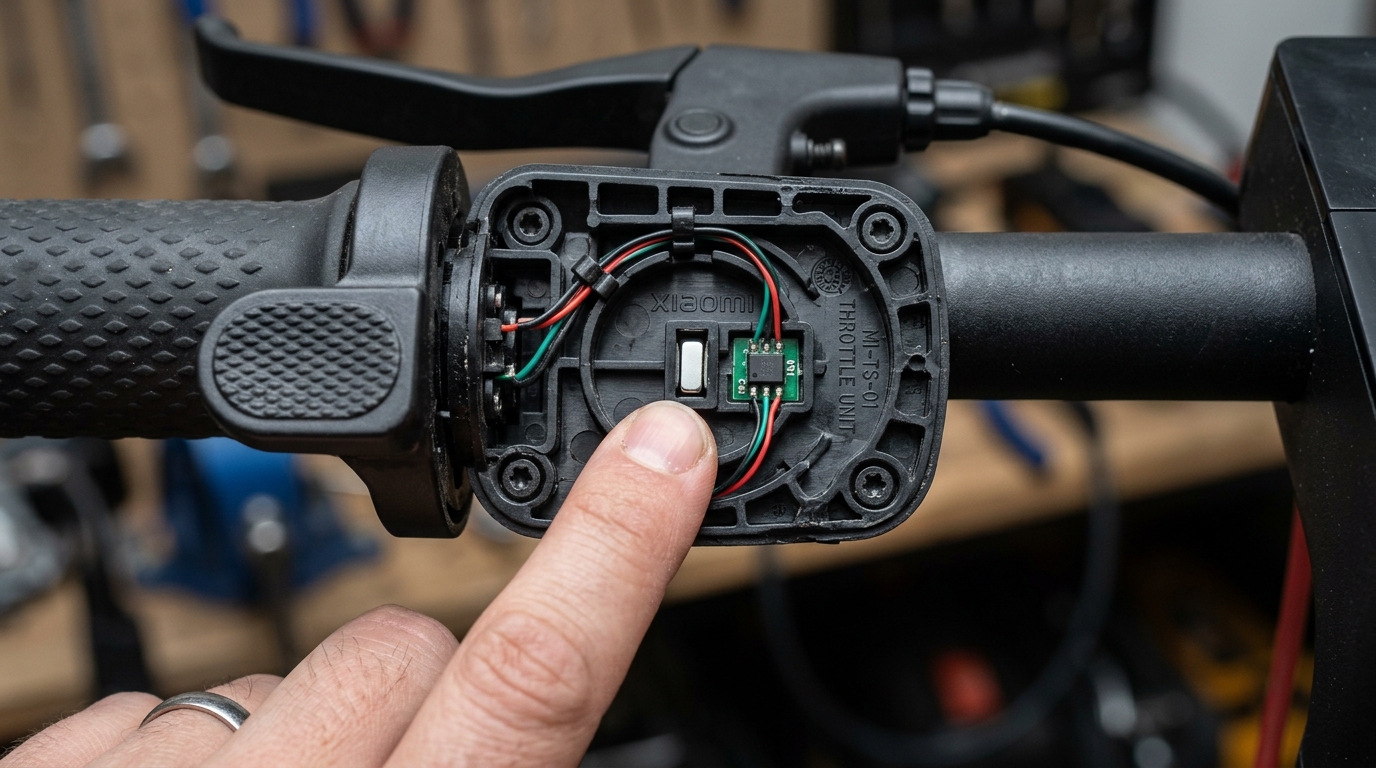
Throttles and brake levers on Xiaomi scooters use a magnetic Hall sensor. If the throttle was bumped during a crash, the small magnet inside might have slipped out of position. Push the throttle lever down and look underneath to see if the small silver magnet is missing or shifted. If it shifted, push it back into its slot with a drop of glue.
- Step 4 of 5
Remove the Faulty Assembly
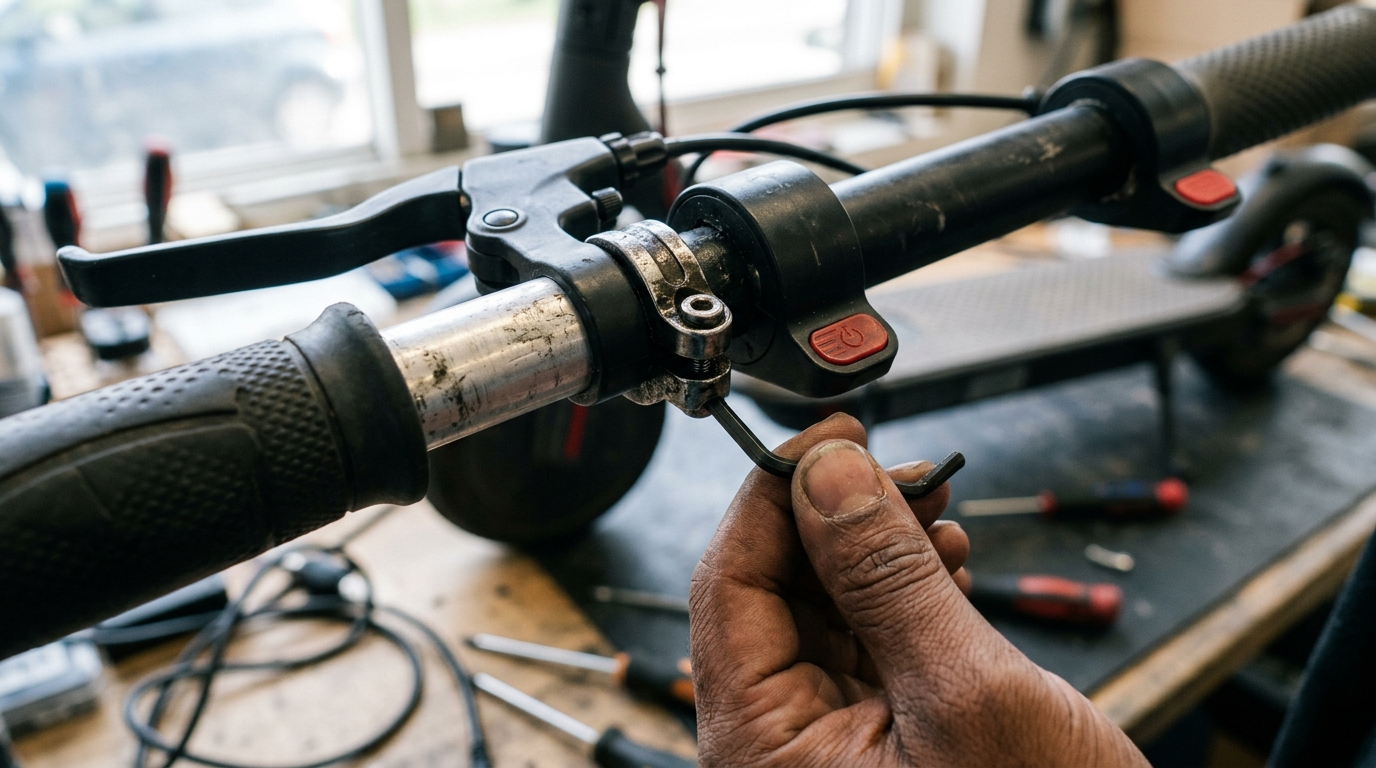
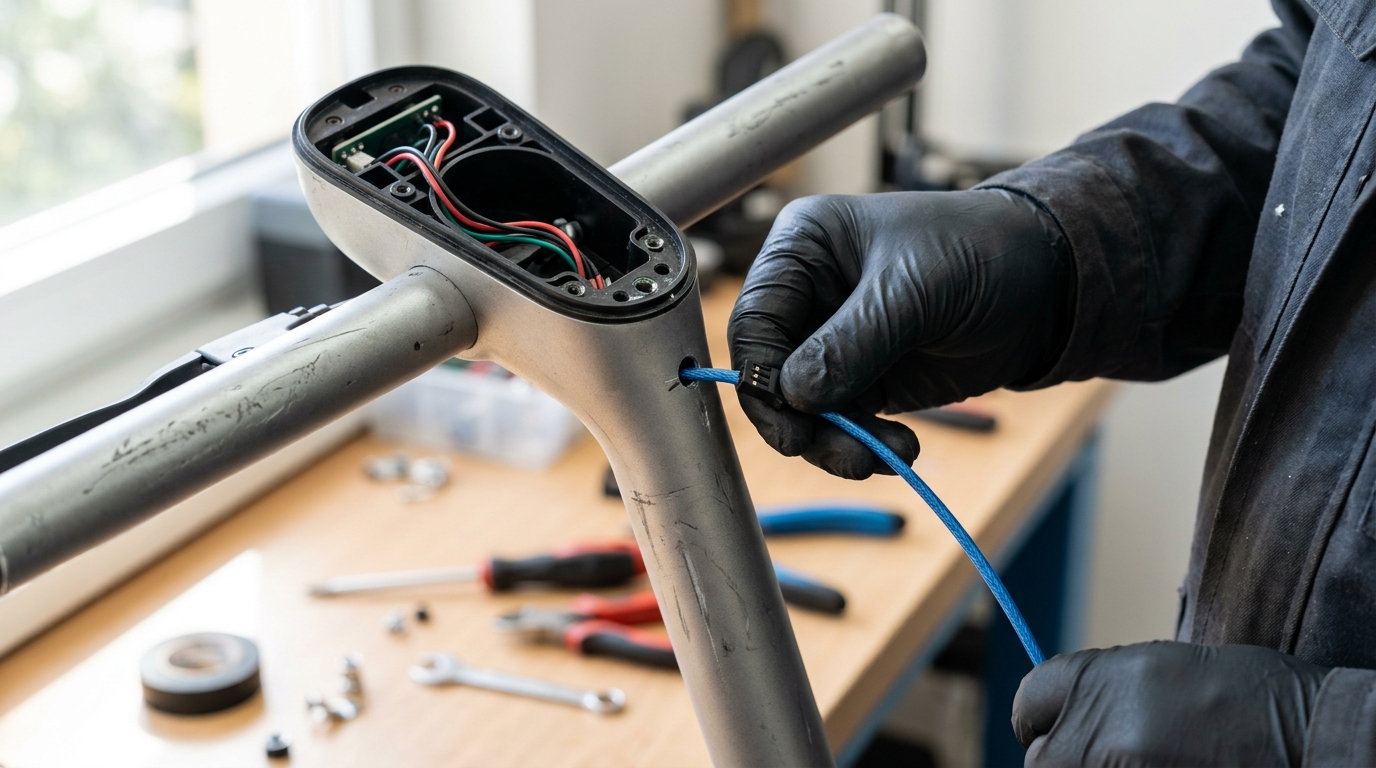
If alignment is correct but the error persists, the Hall sensor is dead and the unit must be replaced. Slide off the handlebar grip (use soapy water or rubbing alcohol under the grip if it is stuck). Use a 3mm hex key to loosen the clamp screw on the throttle or brake lever. Unplug the connector from the dashboard and pull the wire out through the handlebar hole.
- Step 5 of 5
Install the New Component
Feed the connector wire of the new throttle or brake lever through the handlebar hole and guide it up to the dashboard area. Slide the new unit onto the handlebar and tighten the 3mm hex screw. Plug the connector securely into the dashboard. Turn on the scooter to verify the error code is gone. Finally, slide the grip back on and screw the dashboard cover back into place.
Understanding Xiaomi Error Codes 14 and 15
Xiaomi electric scooters use Hall-effect sensors to measure the positions of the throttle and brake levers. A Hall sensor works by detecting changes in a magnetic field. When you press the lever, a small magnet moves closer to the sensor, which outputs a variable voltage (from roughly 0.8V at rest to 4.2V at full throttle) back to the central controller.
If the controller receives a voltage outside the expected range (for example, 0V due to a cut wire or 5V due to a short), it flags a fault to protect you from runaway acceleration or brake failure:
| Error Code | Symptom | Detection Voltage Range | Primary Cause |
|---|---|---|---|
| Error 14 | Throttle sensor read failure | Below 0.5V or Above 4.5V | Slipped magnet, cut wire, or failed Hall sensor IC. |
| Error 15 | Brake sensor read failure | Below 0.5V or Above 4.5V | Loose connection plug or faulty micro-sensor in brake lever. |
Quick Hack for Error 14
If the throttle lever does not return fully to its starting position because it is rubbing against the handlebar grip, the voltage remains slightly elevated (e.g. 1.2V). This will cause Error 14 at startup. Simply pull the handlebar grip outward by 1-2mm to clear the gap and see if the error disappears.
When to Replace vs. Realign
Before spending money, look closely at the throttle return spring. If the throttle returns smoothly but the display blinks 14, unplug the blue wire from the dashboard and replug it. If the error remains, the sensor IC is likely damaged and replacement is required.